
Introduction
It was some time ago, in December of 2018, where I was in the middle of "off-season improvements" that I decided to build my own transmission.


Welding exhaust flanges in the winter
However, well-built, competitive Honda Challenge transmission builds can get expensive. For example:
*Aftermarket final drive = ~$600
*MFactory metal plate differential = ~$900
*94-01 Integra "Brass Master" transmission rebuild kit from Syncrotech = ~$650
*New transmission gearset and case = ~$150-300 used (depends on seller/condition)
The above combination of parts doesn't consider the use of a better differential either, which can run upwards of $1500 (OS Giken).

OS Giken assembly
So, my goal was to assemble a competitive transmission setup for Honda Challenge H4 using as little resources as possible. Similar to a lot of other parts on my car, I planned to hunt Facebook Marketplace, forums, eBay, and Craigslist for sales or deals on used parts for the build.

Custom eBay cold air intake, MSD coil bracket made from an oil pan, and an entire MSD setup I got for ~half-of-retail price
The first part of this series will cover selecting the differential.
What Does a Differential Do?
Whether in a front-wheel, rear-wheel, or all-wheel drive car, the differential takes power from the transmission's final drive and distributes it to the left and right axles.
The simplest and most common differential is termed an "open" differential by car enthusiasts.
I'm not going to delve into specifics about this differential type. The most important thing to remember about an open differential is that by design, the wheel with the least grip spins the fastest.
This means, when going around a corner, you'll notice the car has a tendency to spin the inside wheel while the outside wheel isn't getting power. Not only is this slow, but it's also lame. In drag racing, this tends to result in one-wheel burnouts.

For specifics on an open differential, check out the video below:
LearnEngineering's video on open differential function
The next type of differential is called a "limited slip" differential (because it limits the slip of the wheel with the least grip).
There are two common types of limited slip differentials-- a torsen or gear-type differential and a metal plate or clutch-type differential.
A torsen differential uses gears to limit slip and transmit power more evenly between the two axles. Since I don't want to delve into specifics, I'll explain the pros and cons of a torsen:
Torsen pros:
*low-maintenance-- change fluid once a season for a road racing car
*easy to drive at low speed-- good for street driving
*typically cheaper than clutch-types
Torsen cons:
*Corner exit speed is not as high relative to a clutch type
Cannot adjust lockup percentage like in a clutch type
Cannot adjust lockup on decel or accel like in a clutch type
A torsen differential's function is described in the video below:
LearnEngineering's video on torsen differential function
A clutch differential uses clutch packs to transmit power from the transmission's final drive gear to both axles in an even manner which "limits slip." A description of their function is shown below:
Torsen diffs are durable, relatively cheap, relatively fast, and great for daily driving since they don't provide a lot of low speed steering resistance. So why would we want to run a clutch type diff? Let's review the pros and cons below:
Clutch-type cons:
*Expensive fluid with friction modifier generally needed
*Requires fluid change after every weekend to avoid excess wear
*Can fail sooner than torsens if maintenance not kept up
*Expensive to purchase
Clutch-type pros:
*Generally faster than torsens in a FWD car mid-corner to exit if set up correctly
*Adjustable for lockup on decel and accel
*Amount of lockup is adjustable
Seems like there are a lot of cons to running a clutch-type. So why would we run it? Well-- real-world experience and data suggest there's a benefit in lap time from the lowest Honda Challenge classes to the highest.
For example, exiting corners, I sometimes have to wind my wheel out sooner and take a wider line to avoid cooking tires while competitors with clutch-type diffs can stay tighter, taking up less distance and thus less time. Data reinforces this conclusion from the "butt dyno."
Watch corner exit speed in the in-car vs the silver hatch
Another example was when I drove the white DA Integra on the left and laid down a 0.7-second-faster lap time than in my car on my fourth lap ever in the DA. Mid-corner and corner-exit grip were notably better due to the diff.
NOTE: There were other variables in that case. The car's final drive helped with corner exit speed at the track we were at. The DA also had better, double-adjustable Konis in it than I had which made curbing a breeze to drive over. And lastly the Integra was more stiffly sprung in the rear, which helped it rotate.

Brian's DA Integra and Damien's EK Hatch with an E30 in tow
What's the Diff?
I eventually found a Spoon Sports 1.5-way B16/B18B1 diff for ~$350 used. Not knowing much about diffs and willing to take a risk, I drove down to Delaware, very close to where I lived at one time in my life, and I picked up this diff without asking many questions.


Diff with B18B1/B16 ring gear diameter
These diffs typically cost more than $1100 new on the internet. I considered myself lucky at the time.
Making it all Work
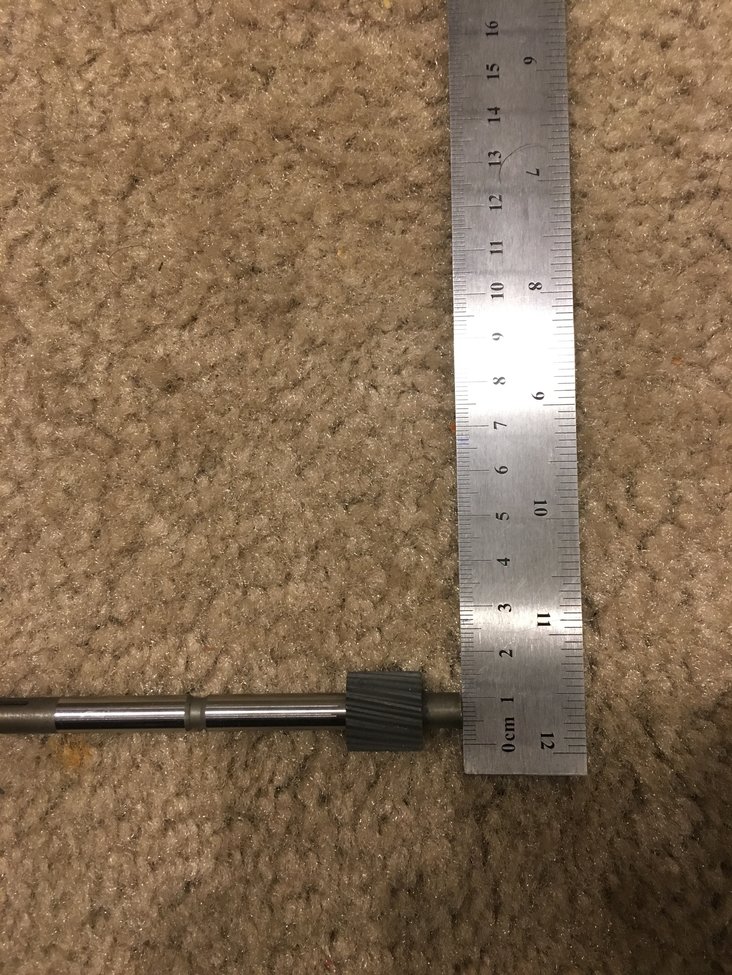
The first thing I noticed when I brought it home was that the ring gear where the vehicle speed sensor (VSS) goes was chewed up. This was concerning:

This was likely caused by the previous owner not using the correct VSS gear. Typically, when you buy a new diff, the diameter of the case is larger, so the manufacturer will include a different VSS gear to match up with the diff. This is most common with:
*OS Giken
*Cusco
*Kaaz/Spoon
So, I began looking for VSS gears for a Spoon differential. This part is hard to find as people don't typically sell it used and you usually have to buy it straight from the manufacturer. However, since Kaaz makes the Spoon differential for the B Series tarnsmission, I was able order a new one for $150 shipped through their US sales department.
This brought total cost to $500...
This brought total cost to $500...


Some pictures from my thread at Honda-Tech.com
Next, I opened up the differential and looked at the internals to see how bad the clutch packs were and if any of the gears were damaged. Kaaz has a handy video that shows you how to disassemble their differentials shown below:
Differential assembly and disassembly
The plates had some of their clutch material worn off but none of them were missing teeth or extremely burned up. Pictures of the plates are below:


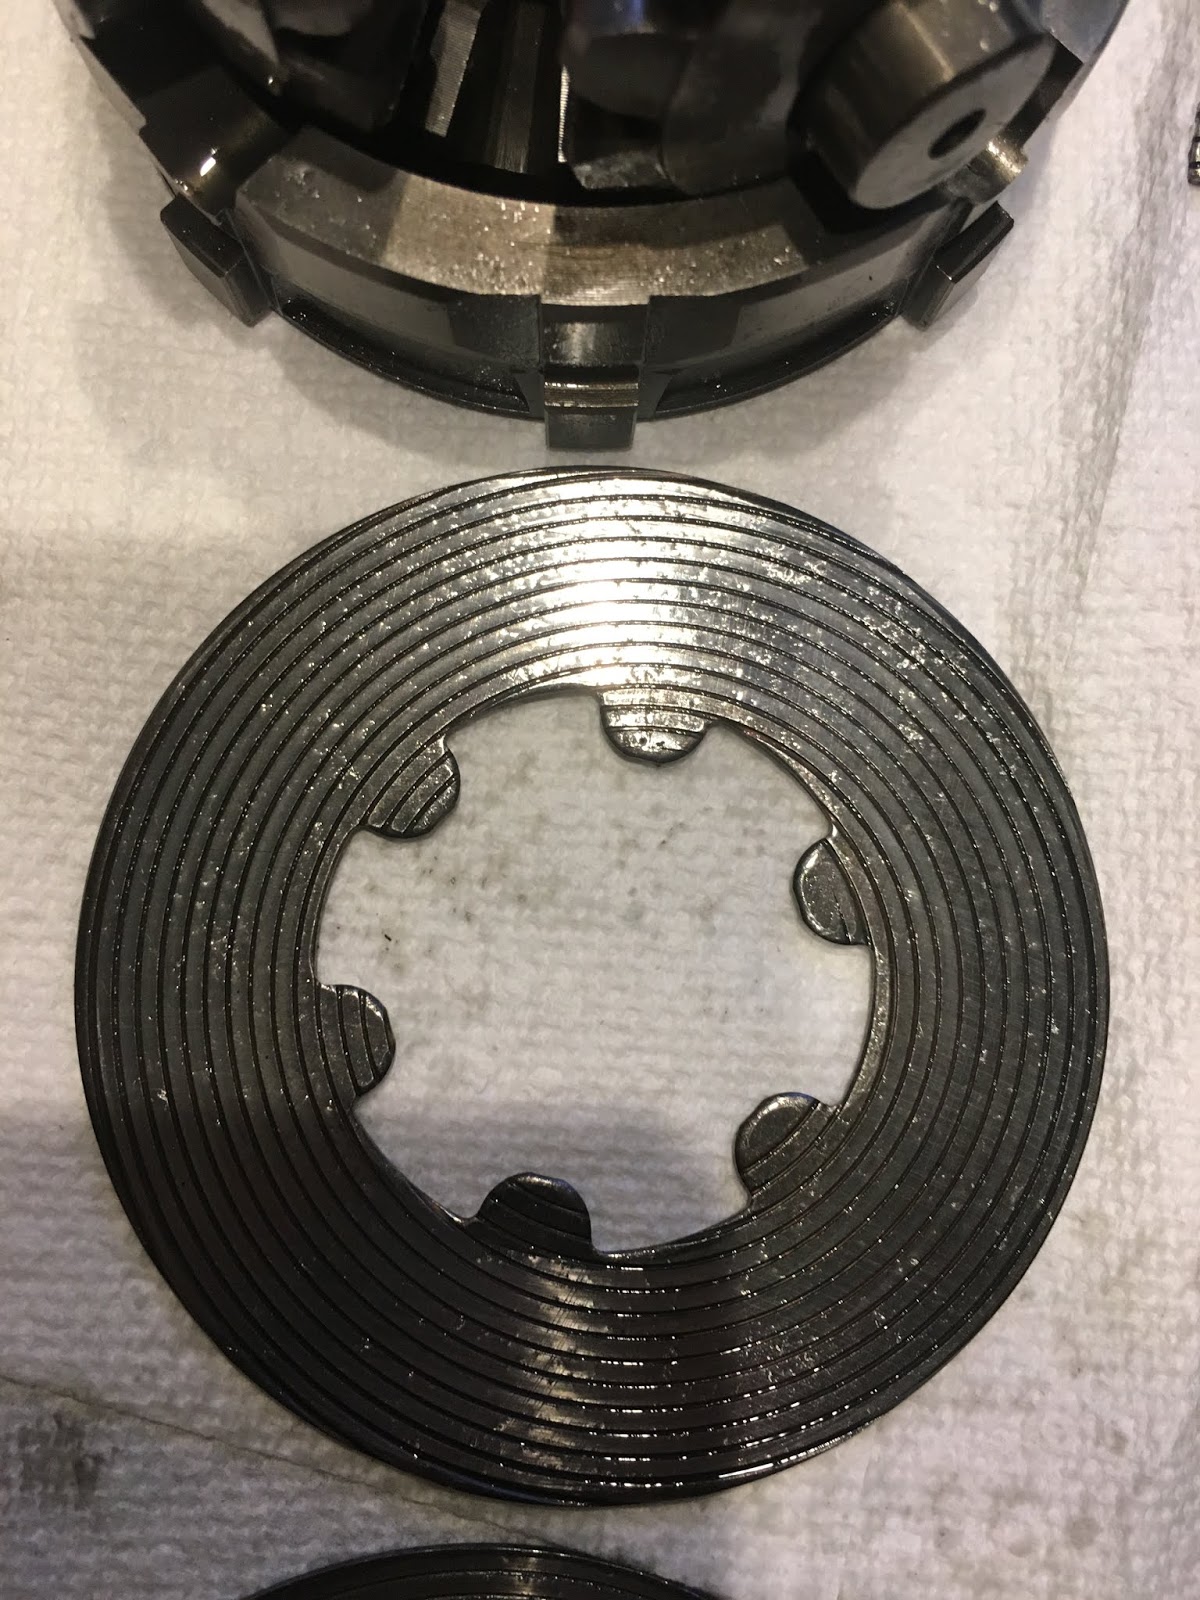


All twelve clutch plates from the Spoon/Kaaz differential
The belleville washers were in rough shape. Lots of scoring around the inner and outer diameter of the washer with a slight burr formed on the inner diameter of one of the belleville washers. Additionally, the thrust washers were of different IDs and ODs and thicknesses. In the pictures below, Thrust Washer B was thicker than A which suggests the previous owner tried altering initial lockup of the diff.
When I sent pictures of just these four pieces (NOT even the plates), Kaaz recommended a full rebuild kit-- about $250 dollars (wasn't gonna happen). I requested the individual parts to no avail. Kaaz would only sell all or nothing:


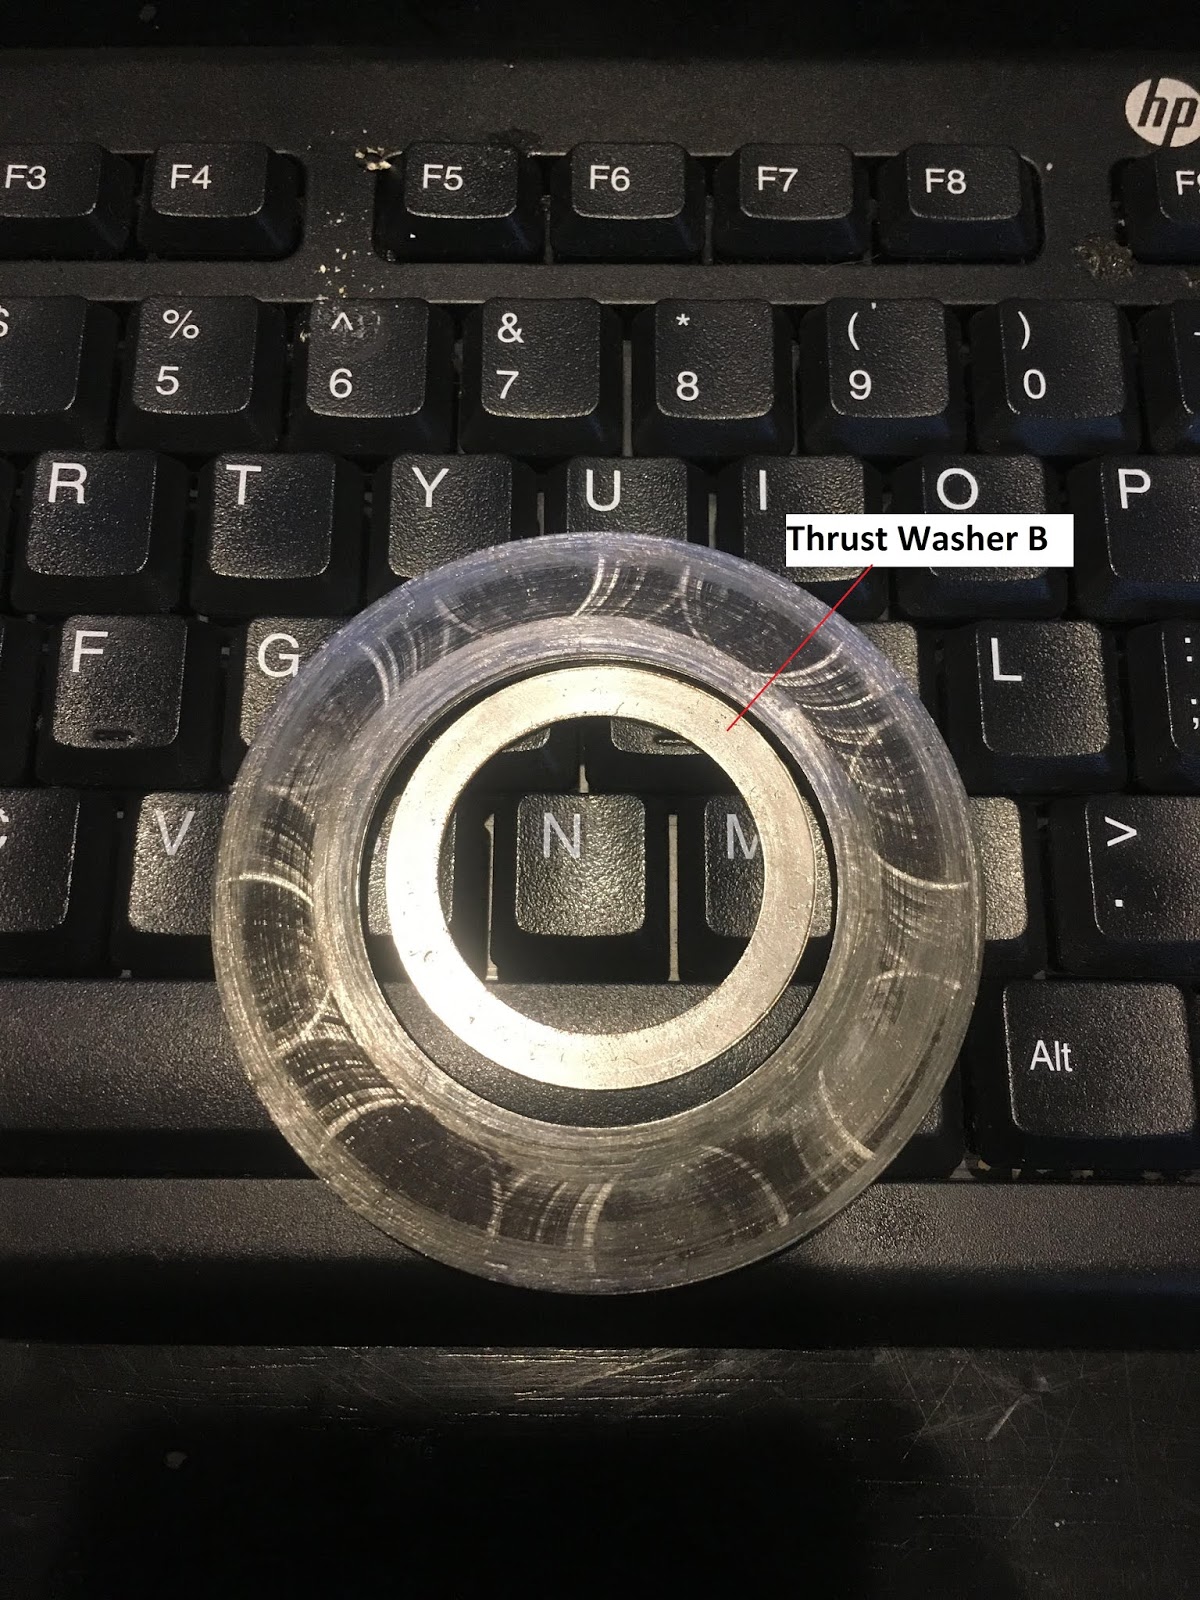
Thrust washers, belleville springs, side-by-side
To see how messed up my diff actually was, since Kaaz stated they "don't recommend patches," I began doing some research.
I spent a long time trolling the internet looking at the condition of others' diff plates, experiences they had with their Kaaz diffs, and reassembly and maintenance recommendations. I read probably somewhere between 20 and 30 Honda-Tech.com threads, watched a bunch of YouTube videos, and stumbled across some less-known, but extremely helpful resources such as a blog called Pinderwagen.com.

Pinderwagen's tricked out Volkswagen
Pinderwagen was extremely useful in helping me determine that my clutch plates were probably in good condition. I read their article on obtaining a used Kaaz unit similar to mine and saw the condition of their plates.
After reading about their experience tracking the car with the plates in the as-found condition for a full season, I found out that their car performed very well. I also saw that their data confirmed my understanding of speed from a plate-type vs. a torsen diff. As a result, I decided to rebuild my diff as it sat-- also per directions on Pinderwagen and from other sources.

Pinderwagen's article on rebuilding a Kaaz diff
Rebuilding the diff is as follows:
1.) Clean the internals of the diff with solvent
2.) Lube all components with fresh differential fluid (I use Torco RTF per recommendation from other racers)

Torco RTF
3.) Reassemble the diff in order from either Pinderwagen's article or the Kaaz video on YouTube.
4.) Torque the allen bolts to spec for the diff

Assembled Kaaz diff on my dinner table with some Neshaminy Creek Brewing Company IIPA
Thanks for reading and see you guys here next time.
No comments:
Post a Comment