"Modern" Fuel Injectors
Fuel injectors are tiny valves that feed gasoline into the intake runners or directly into the cylinder of an internal combustion engine. On some cars, injectors can open and close (one cycle) 50 times per second at engine speeds in excess of 6,000 RPMs.

As wisely stated by Super Street Magazine, fuel injectors are the analogous equivalent to the beating heart in the human body. These devices can cycle as much as 562,500,000 times in a a typical 200,000-mile Japanese car, and as a result are subject to significant abuse and damage over time. Needless to say, these components are very important.

An extreme example of a plugged injector.
Use and Abuse
Due to their location, injectors are exposed to unburned hydrocarbons such as gasoline and engine oil, byproducts of hydrocarbon combustion such as soot, and other contaminants. Heat, vibration, and constant cycling between open and closed states exacerbate the negative affect these contaminants have on injector health.

Another extreme example of a plugged injector
Poor injector health can have a plethora of negative side-effects. On commuter cars, most people don't get concerned until their car doesn't idle properly or hesitates under load. These can be side effects of fouled injectors causing inadequate fuel delivery to one or more cylinders.

However, most of our race cars are running in good enough condition that they do not stutter under load or hesitate at idle (at least as a result of poor injector health). Injectors are important in this context because in racing, the concern is always, "how do we get MORE SPEED!?"

Spencer, Kallie, Dame, and Ken saying "MUST GO FASTER!!!"
But why would clean fuel injectors give us more speed? Let's cover the basics first...
The Basics of Fuel Delivery in Modern Cars
Fuel delivery to the engine is controlled in a negative feedback loop where the air-to-fuel ratio (AFR) is first measured in the exhaust stream. The car's computer (ECU) reads the air-to-fuel ratio, and it knows whether there is too much (rich) or too little (lean) fuel going into the engine based on the reading. Knowing the AFR, the ECU can alter the amount of fuel going to the engine by increasing or decreasing "fuel trim" as detailed below:
When the AFR number is too high, there is a larger portion of air in the exhaust stream, suggesting that fuel delivery is inadequate-- the computer will then tell the injectors to let more fuel into the engine (increasing trim).
When the AFR number is too low, there is less air and more fuel in the exhaust stream, suggesting that fuel delivery is in excess-- the computer will then tell the injectors to let less fuel into the engine (decreasing trim).

In a naturally aspirated car, an air to fuel ratio of 14.7 is optimal at idle, but under heavy load the optimal ratio varies from ~12-13 depending on application.
Consequences of high or low AFRs
An engine that runs on the lean side may make more power than an engine that runs a little rich under load. As a result, some tuners will install adjustable fuel pressure regulators (FPRs) to lower the pressure upstream of the injectors, which will lower the volume of fuel delivered to the cylinders. For example, on my stock Integra LS motor, AFR at wide open throttle (WOT) was about 12.1:1. To get more power out of the car, I tuned this to somewhere near 13.3:1.

So, why not starve even more fuel if leaning out a car will increase power? Adding more fuel than is needed for optimal power levels means there is more cooling provided to the cylinder in the form of unburned gasoline. Manufacturers typically want to make their engines last a very long time, so to improve reliability, stock engines typically run a little rich under load.
When a car is leaned out, the cylinder temperatures will be higher, increasing the risk of pre-detonation (fuel combusts too soon before top-dead-center) and damage to the engine.

An engine that runs too rich is no good either, as excessive fuel (a solvent) can wash away oil which lubricates the piston-to-cylinder interface and prevents damage and scoring.

The spark plugs can sometimes indicate whether your motor is too rich or too lean
Bad Injectors Are Bad Mkay?
Most engines in sports cars have more than one cylinder. Ideally, AFR would be measured at each individual cylinder and fuel trim would be changed at each individual injector accordingly. However, this would increase complexity and cost-- so manufacturers choose to measure AFR in a point downstream of all four cylinders.

This means that if one cylinder is burning lean due to a fouled injector while the rest of the cylinders are burning optimally, the computer may not know that there is a significant issue present and may only slightly increase fuel delivery. Additionally, fuel delivery will be increased to ALL of the injectors which will make the cylinders with healthy AFRs now run rich and the cylinder with a lean AFR run closer to optimal.
What This Means for Racers
So why not install an aftermarket ECU that can measure AFR at all four cylinders in this example and tune it to deliver the optimal fuel volume? Well, in some club racing classes such as Honda Challenge H4 (HC4) and Spec Miata (SM), it is illegal to run an aftermarket ECU (as of 2020).

So, these racers must find other means to insure the health of their engine and increase their horsepower. As mentioned above, fuel pressure regulator tuning is a popular technique used to increase horsepower without ECU tuning. Remember that to make more horsepower using this technique, one must lean out fuel delivery as much as safely possible while the car is operating at WOT.
But how much is "safe?" In a thread on the MazdaRacers.com Forum, members discussed the benefits of fuel injector cleaning. One member states that a customer of theirs blew up their motor while on the dyno due to leaning out the car too much. They sent the injectors out to be serviced and they discovered that one of the injectors was bad.
So, as detailed above, it's very important to know the health of your injectors and to ensure they're as clean as possible before extracting the most power you can out of your engine via FPR tuning.
Decisions, Decisions...
So, you now know how important it is to have clean fuel injectors. But what should you do? If you're racing, there are five options that come to mind:
1.) If your car runs, you can send it
2.) You can buy aftermarket OEM replacements
3.) You can do "parts bin tuning"
3.) You can do "parts bin tuning"
4.) You can try and clean your OEM injectors on your own
5.) Or, you can have your OEM cores cleaned by a professional shop

Cheap, "OEM" re-manufactured injectors from eBay
Here's why you may want to or not want to choose one of those options above:
Option #1: Send it

Aside from being a funny thing to say, and something people say to appear cool and laid back/chill, "sending it" could be what's right for you. The other options I mentioned above are not free and do require time and effort-- whether you're researching the best aftermarket replacement to buy, service shop to choose, or DIY method for cleaning.
Additionally, as I mentioned above, most race cars I've seen in lower power classes such as HC4 and SM run perfectly fine with their stock AFRs, offering reliable, fun track time.
When building a race car or tuning one, it's important to attack the low hanging fruit first. If your suspension or brakes are not up to par and you're on a budget-- save your money and tackle those items first.
Option #2: Aftermarket or OEM Replacements
The beauty of running an older track car like a Honda or a Miata is that there are usually huge, supportive communities and a vast supply of aftermarket parts-- fuel injectors included.
If you go on eBay and look for a set of stock Integra LS injectors, a set of aftermarket re-mans usually go for about $40 with free shipping. This is an extremely low cost and as a result it is an attractive option. Amazon even sells cheap, aftermarket replacements for about $45 with one-day shipping!
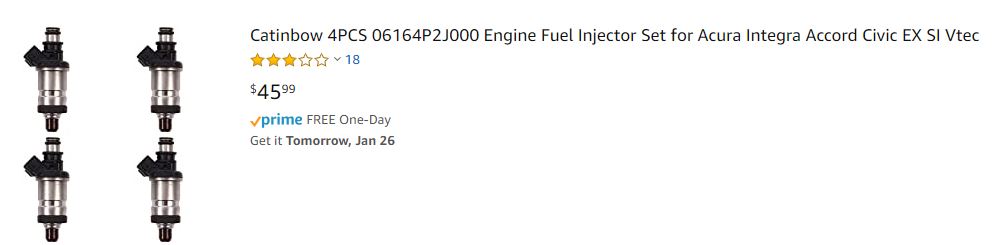
Cheap "Catinbow" Injectors
The downside of cheap, aftermarket injectors, however, is a lack of specs regarding flow pattern, flow volume, or how closely they adhere to OEM requirements. Sure, your Catinbow injectors might be 45 dollars shipped in a day with Jeff Bezos' extremely convenient Amazon service, but do you know how well they're made?
As documented on Motor.com, not only is the proper flow rate or pressure important, but so is the spray pattern of an injector. OEMs pay PhDs a lot of money to determine optimal intake runner design and cylinder head geometry to ensure the best cooling, atomization, and combustion efficiency. In fact, my rule-of-thumb for most mods on my own race car is to keep as much as I can OEM while still building a competitive car per the rules.

But what about OEM replacements? They have the right specs and you can be sure that they're going to give you the best performance.
Except, you forgot to consider the drawbacks of owning an old track car-- such as dealing with OEM-discontinued parts. Even if you can find a set of new injectors for a 20-year-old car, they will likely be costly. For example, a set of injectors for a 1998 Acura Integra LS (06164-P72-010) goes for about $170.

Fancy but Expensive Injectors
Option #3: Parts Bin Racing
In spec classes, especially, parts bin tuning is a very popular way to make your car incrementally faster. Parts bin tuning consists of buying multiple used components that you'd like to test and installing them one by one and recording the results.
There are tales of some dedicated SM race shops, for example, buying about 10 old Miata ECUs and trying each one on the dyno to see which one makes the most power. Another tale is of SE30 racers that buy multiple used MAFs and test each one for the most power on a dyno.

In this instance, we're talking about parts bin tuning with fuel injectors, which was outlined in an article by another fellow H4 racer, Rob Krider of Double Nickel Nine (DNN) Racing. In Rob's article, he was provided access to an injector flow tester and cleaner. He then tested multiple injectors that he found at a local scrap yard and picked the most evenly matched and highest flowing ones to use on his race car. Results proved successful as he made more power on the dyno.

Rob Krider of DNN on the dyno
This technique is probably the most optimal for a class such as mine, HC4. However, it requires access to a plentiful amount of spares, it requires money for testing the spares on an injector cleaner/flow tester, and it requires dyno time.
As a result, parts bin tuning is usually very expensive. Therefore, I did not choose this method.
Option #4: Do it Yourself!!!
To my readers' surprise, I actually didn't choose to tackle a project as a DIY for once. Yes, it's likely the cheapest route, but it takes the most time and results can vary distinctly.
For example, Super Street tested fuel system cleaners on a 210-k mile Acura Integra (DC4) and 190-k mile Mazda RX7 (FC3S). The results were disappointing. The injectors on the Integra didn't clean up at all after using Pro-Gard Fuel System Cleaner and not much improvement was noted in the RX7 either.

Pro-Gard
Sure, there are probably better, more thorough ways to clean injectors on your own-- and I have done these in the past. But they take a lot of time and can be unsafe in some instances.
For example, I once attached a vacuum tube to the inlet of an injector needing cleaning, filled the tube with acetone, hooked up a tire air compressor to the vacuum tube, and then created a power supply using an old wall outlet adapter (AC-to-DC) and some wire crimpers. Exposed electrical leads and a volatile solvent? Yeah, I think not...
Option #5: Make Someone Else Do it!!!
Ahh yes, Capitalist America's favorite solution to most problems people face-- if you can't do something, just give someone money to do it for you. Always works right?
Stupid stock photo because pictures
For this option, you'll need to research the company that is the best for you. Make sure whoever cleans your injectors provides you with a flow sheet of before and after cleaning results, make sure they provide some assessment of flow pattern quality, and make sure their turnaround time meets your needs. This all takes time and is a drawback for this option.
Prices for these services are also somewhat high and can range from ~$75 to $100 not including shipping, but when all is said and done, it's cheaper than a new set of OEM injectors, a little more expensive than a set of knock-offs, and the results are more promising than a DIY project.
In case you were wondering-- yes, this is the route I chose for my Civic.
Mr. Injector
The OEM Keihin fuel injectors on my race car were in service for over 170,000 miles and were over 20-years-old. They weren't leaking and the car was running well. I also had tuned the car with a fuel pressure regulator on a dyno earlier in the season and it made some extra horsepower. Yet, I still figured now was a good time to finally have them serviced.

Crusty and Old Injectors
I chose a shop out of Illinois called Mr. Injector after being referred to them by my good friend Alex who is the owner of #TrashTeg and also has been building cars for a long time now.

The Mr. Injector Logo
Bill has been operating his business for over 25 years and it shows. Turnaround time was less than a week in total, communication was timely, and the finished product looked and performed extremely well.

Can't believe these are the same injectors I sent out!

More pics

More pics again...

A Picture of my son, Pidgey, standing next to a Jolly Rancher and serviced injector
Along with my new injectors, I received installation instructions to prevent damage to the seals and I received the flow test results from before and after cleaning. While all of the injectors were (apparently) out-performing the manufacturer-specified 244 cc/min, the flow they were delivering was highly varied. After cleaning, they all flowed at 260 cc/min. The biggest improvement in flow was 6% at one injector.

Flow test results from Mr. Injector

A nice bar graph of before and after results
Concluding Remarks
Would I go to Mr. Injector again? Yes. I've seen his work put to the test in my buddy's builds and his work was fast and of high quality. I'm looking forward to installing these on my car and I'm glad I haven't ran into any issues at the lean AFR I'm currently running on my Honda Challenge H4 car. Maybe I can lean it out even more now!
Thanks for nerding out over injectors with me, readers. Until next time, have fun and take it easy.